Remotely controlling an AC unit from Home Assistant with an IR blaster
In my previous post I described how I reverse engineered my AC unit’s IR remote control’s message protocol and how I could encode my own control messages into a format that can be sent from an IR blaster to control the AC unit. In this post I’ll describe how I integrated that work into Home Assistant so I could control my AC remotely from within HA.
I use Home Assistant OS with the Zigbee2MQTT, mosquitto and Node-RED add-ons. My IR blaster is paired with Zigbee2MQTT, and I’ll use Node-RED to build the automation for the AC controls.
Node-RED automation
The Node-RED add-on for HassOS integrates very nicely into Home Assistant out of the box, however it does require installing this companion integration yourself to get full functionality. Afterwards, you can create nodes in Node-RED that correspond to entities in Home Assistant, all grouped under a single device. The nodes can be set to listen for changes to their corresponding entities and emit messages containing the changed entity’s state, and other auxiliary information.
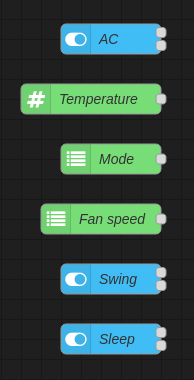
As explained in the previous post, the IR remote protocol contains a field that tells which button on the remote was pressed to generate that message. This can easily be included as auxiliary information in each entity node as an msg.button-field.
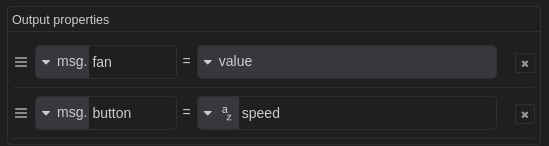
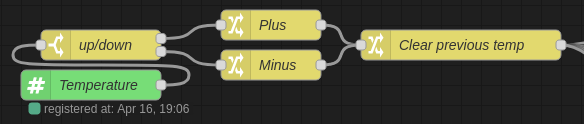
However, the target temperature node proves a little more difficult since either the plus- or minus-buttons have to be “pressed” depending on if the target temperature was increased or decreased. Luckily the node has an option to emit both the entity’s current value as well as its previous value, so those two can be compared and the msg.button-field set accordingly. Finally, to prevent an issue later on, the previous value is removed from the message.
When any of the entities changes state, its state is emitted from the node and moved on to the IR encoding, however since the IR message contains the state of all these entities, their states have to be included in the Node-RED message as well. That’s where this glorious spaghetti comes in:
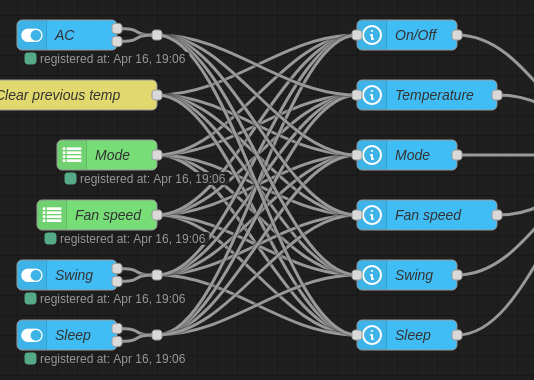
What this spiderweb does is forward each emitted message from the entity nodes to entity state nodes that gather the state of every other entity, except the one that emitted the original message. Out of this comes out six messages in total: one for the changed entity, and ones for each of the other entities’ current states. In order to combine these messages into one, a join-node is used to combine seven message parts. Seven parts are used instead of six, as the amount of messages would suggest, is because a message “part” in this case is really just a property in the message, i.e. one entity’s setting. However, the first message has two parts: the changed entity’s state, and the auxiliary “button press”, the msg.button-field.
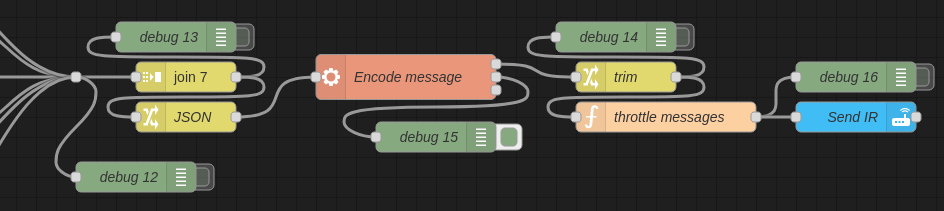
The rest of the flow is fairly straight-forward: convert the message into a JSON-string and pass it on to the IR encoder Python script. I didn’t feel like reimplementing all of the Tuya- and IR-message encoding into JS inside Node-RED so instead I opted to install Python in the Node-RED add-on and call the script from within the flow. Once the message is encoded into the Tuya-format, it is trimmed, throttled and sent to the IR blaster.
The throttling is done to deliberately slow down how many IR payloads are sent to the blaster over time. The blaster takes around a second to react to the sent payload and blast it out, so if during that time any more payloads are sent, they are discarded internally. This would mean rapid changes to the AC controls, such as incrementing the temperature with single steps, the later messages wouldn’t get to the AC and it would be desynchronised from Home Assistant. To solve this, the throttling waits for a set timeout (in this case 700ms) after having received a message before sending it further along the flow. If a new message arrives during that timeout, the previous message is discarded and the timeout is restarted for this new message. This way if multiple messages are sent in succession, only the last one is actually sent, which contains the currently wanted state for the AC unit.
const timeout = 700;
let timer = context.get("timer") || null;

// if the timer isn't running, start it
if (timer === null) {
    let timer = setTimeout(() => {
        // once the timeout ends, send the last message
        node.status({});
        msg = context.get("message");
        context.set("message", null);
        context.set("timer", null);
        node.send(msg);
    }, timeout);

    context.set("timer", timer);
}
// the timer is running, restart it
else {
    timer.refresh();
}

context.set("message", msg);
node.status({ text: msg.payload });
The final Node-RED flow can also be found in the Github repository.
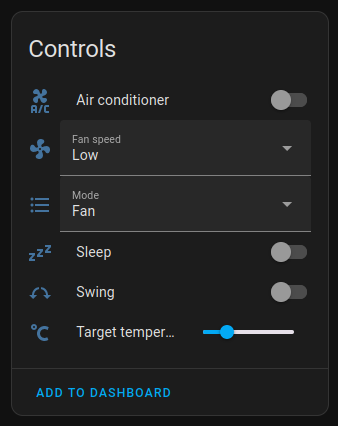
Home Assistant dashboard and IR blaster performance
Since all the control happens in Node-RED, all that’s left is to create a Home Assistant dashboard for it. I used the sections-style dashboard for the AC. I’ve included its power and energy use in the dashboard as well. I use the Nous A1Z smart Zigbee plugs to control and monitor the power usage of individual devices, including the AC unit.
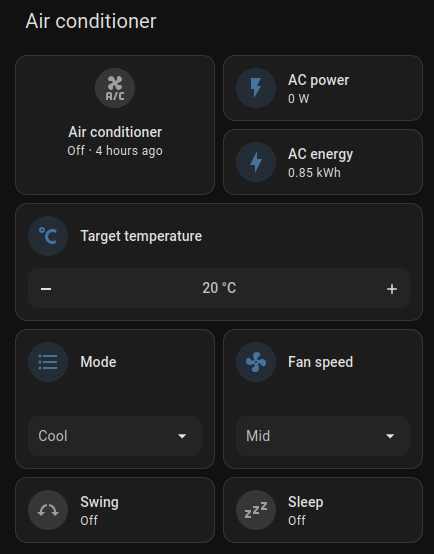
As a reminder I use the Moes UFO-R11 IR blaster that I bought from AliExpress. Changing any setting in the dashboard the change is immediately reflected in the Node-RED flow, and the IR message is sent 700ms later due to the deliberate throttling. It takes maybe another 700ms for the IR blaster to send the message and for the AC to react to it, but the 1-1.5s overall delay isn’t an issue. The IR blaster seems to have decent range, its specifications say up to eight meters, which seems to be true. I was also able to send IR signals without direct line-of-sight, so long the signal can bounce off a wall or something such.
Conclusion
Overall I’m happy how this turned out. The IR blaster was very cheap, works very well indoors and runs on batteries. I had a lot of fun reverse engineering the control protocol and writing my own encoder to ultimately use in Home Assistant. The project’s code is in Github, and as always, thanks for watchi-